| Blog | Technical Writer | Technical Analyst | Business Analyst | Admin Support | Projects | Sample Documents | Home |
Part 2 – And now to Configure all the Bits…
So the last thing we did was reboot the Linux server. When it boots back up, we logged in and moved onto the next step to set it up to be an Auvik Collector.
The following commands will download and install the last three packages that we need to configure the server as the Collector.
sudo apt-get install snmpd
sudo apt-get install snmp-mibs-downloader
sudo apt-get install download-mibs
I think I missed in my last article mentioning that (if you are a real Linux beginner) prefacing commands with sudo allows you to run commands as a super user. So the actual command is apt-get install snmpd for example but because that will modify the Linux installation, you have to use sudo apt-get install snmpd which will then cause Linux to prompt you for the superuser password.
This is the more secure method of doing this rather than granting a regular user superuser status permanently.
Since Linux; if you have the server connected to an internet connection; pulls the latest version of packages, you don’t have to update each package you install in this manner.
Once this is done, it’s time to visit my old nemesis… Vi.
There are other editors that can edit conf files but Vi is what I learned on and learned to hate. I have a strange love/hate relationship with it.
So originally, you had to update the snmp.conf file to add +ALL to the file in an uncommented line. So I check it even though I know you don’t need to add that anymore.
sudo vi /etc/snmp/snmp.confThis will open the snmp.conf file. I am not sure if you actually need the sudo on this one, but I do it anyway and it doesn’t hurt.
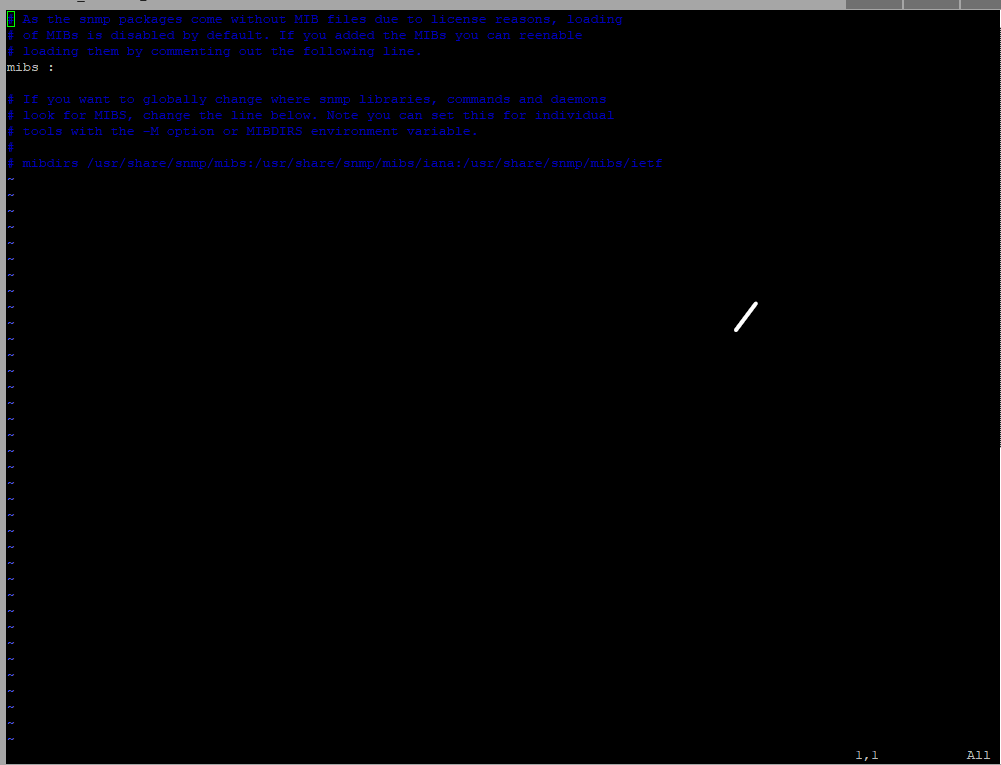
This is what the file should look like unmodified. Next you will need to modify this file…
sudo vi /etc/snmp/snmpd.conf
When the file opens, you move your cursor down to the Agent Behaviour section. Most of the lines are commented out using #. To uncomment a line you remove the # but it isn’t just as simple as delete. No, this is why those of us who learned Windows first have such a hard time with Vi and Linux. Don’t get me wrong, given that these aren’t JUST text files it makes sense but it’s a pain in the arse when you are used to Windows.
I’m not going to teach Vi in this article, but if you don’t know and are interested here is a good article on it https://www.howtogeek.com/102468/a-beginners-guide-to-editing-text-files-with-vi/.
Back to modifying the snmpd.conf file, because of how my network is configured I didn’t need to specify an IP address for the agentAddress, so UDP:161 is sufficient.
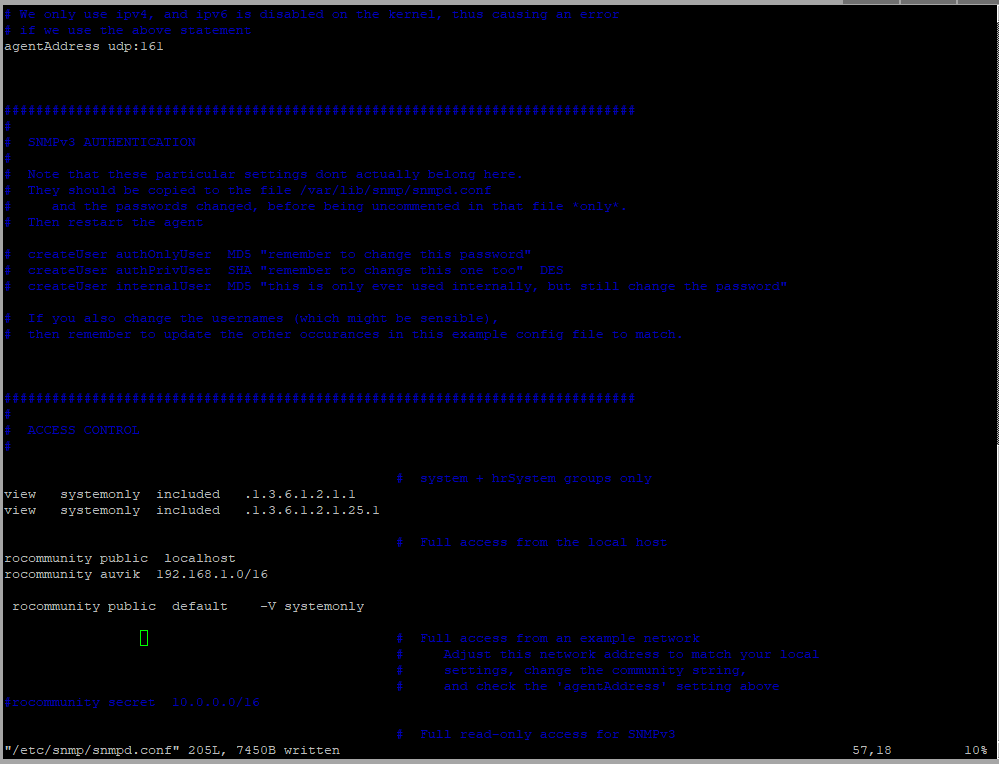
Moving down to the Access Control section, add:
rocommunity auvik 192.168.1.0/16This is the community string that I set up for the SNMP on my network.
Because openSSH server and client was installed in the initial installation of Ubuntu Server, it doesn’t have to be done here. Now it IS time to enable it.
sudo systemctl enable ssh--now
sudo systemctl status ssh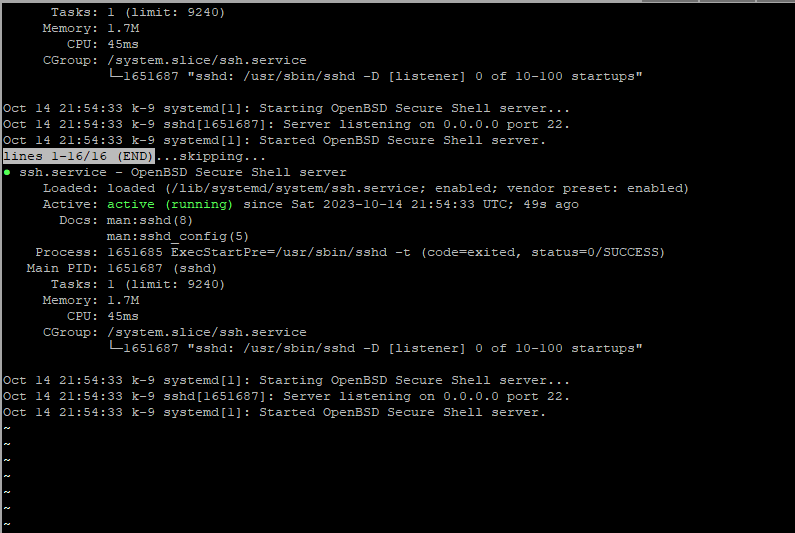
Next step is to make sure that the needed ports are opened in the firewall.
sudo ufw allow ssh
sudo ufw status verbose
The final command shows all the open ports on the firewall.
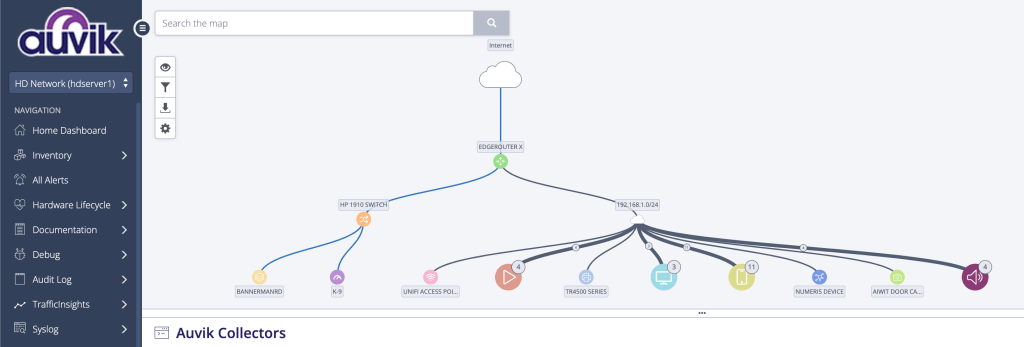
That’s it for setting up the server itself. Next article will be about logging into the server using SSH, downloading the Auvik Software and setting it up. Along with the problems I had and the interesting things I found out by setting up Auvik.
